Customer Requirements
The extension requires a working installation of SAP Asset Manager (SAM) by using Mobile Services for communication. The mobile services instance will be modified by adding two new destinations that allow communication with the extension backend.
To use the automatic report uploads, a working DMS setup is required that exposes the repository via Integration Option API (CMIS API). The used client credentials and DMS endpoints for authentication and Browser binding access need to be communicated to TeamViewer to configure the extension backend.
Mobile Services Modification
The Mobile Services instance that is used for Asset Manager is modified to provide information and services to the extended Asset Manager. This modification does not change Asset Manager operations and only adds functionality on top of the existing services.
Note: You will require information on your Frontline instance that is provided by TeamViewer to perform this step.
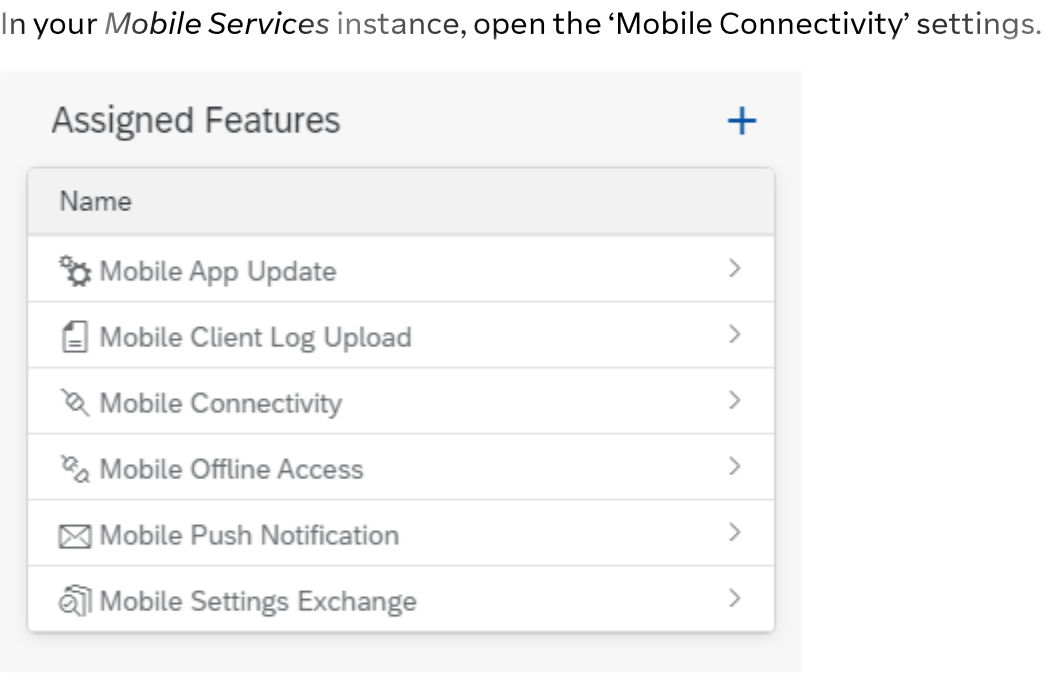
Mobile Connectivity
In your Mobile Services instance, open the Mobile Connectivity settings.
Mobile Destinations
You create two new Mobile Destinations. The order of creation does not matter.
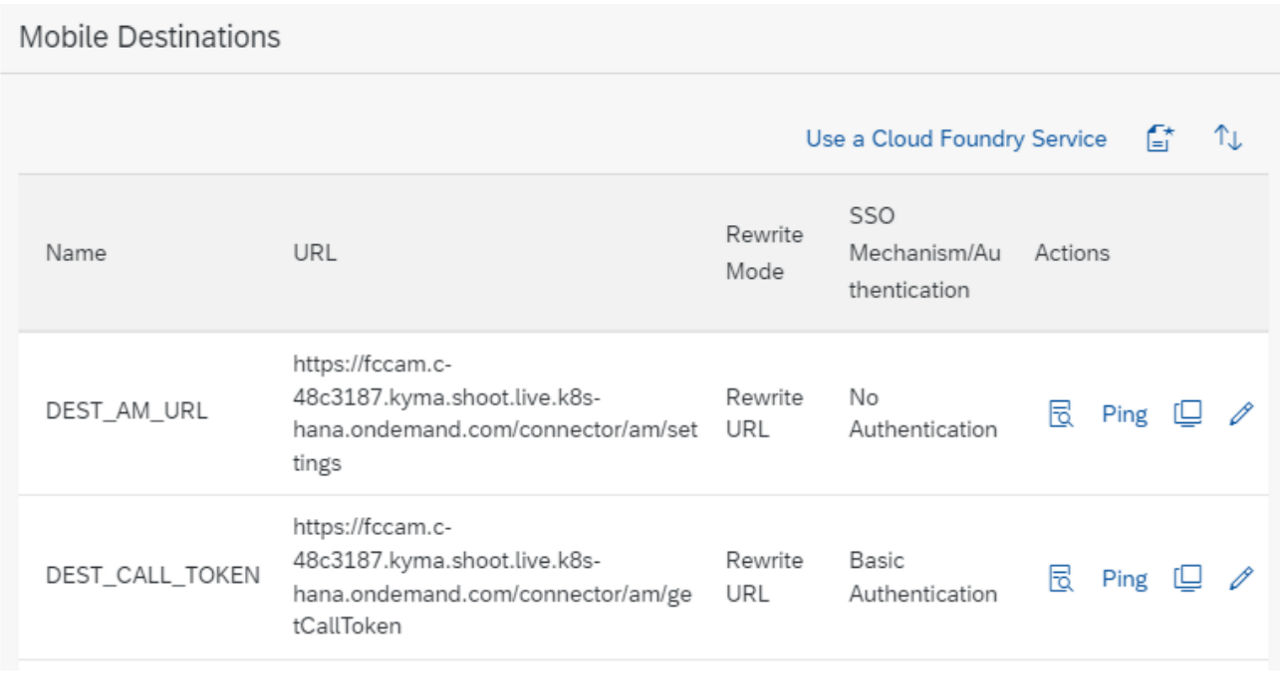
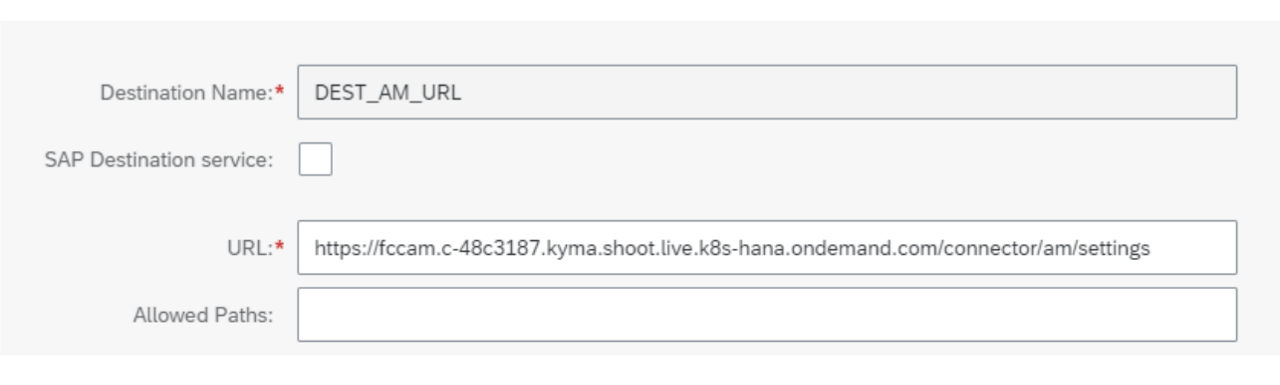
Destination DEST_AM_URL
The destination DEST_AM_URL will return information on the Frontline instance for the extension.
Enter the URL of your instance with /connector/am/settings into the URL field.
In the Custom Headers section, add the following header:
- Accept with value application/json;charset=utf8
and select Override Client.
This is needed to create a correct response from the backend.

Leave the rest of the fields at default. There is no authentication/SSO mechanism.
Note: This endpoint does not return sensitive data.
Finish the creation of the endpoint.
You can test the endpoint by opening it in a browser.

This will return a small JSON structure with information on your Frontline instance, e.g.
- {"amUrl":"https://fccam.c-48c3187.kyma.shoot.live.k8s-hana.ondemand.com/connector/amapp.html"}
If you see this kind of a response, the destination has been set up correctly.
Destination DEST_CALL_TOKEN
The DEST_CALL_TOKEN destination is used to request a signed token from the Frontline backend that can be used to establish a video call.
Enter the URL of your Frontline instance with /connector/am/getCallToken into the URL field.
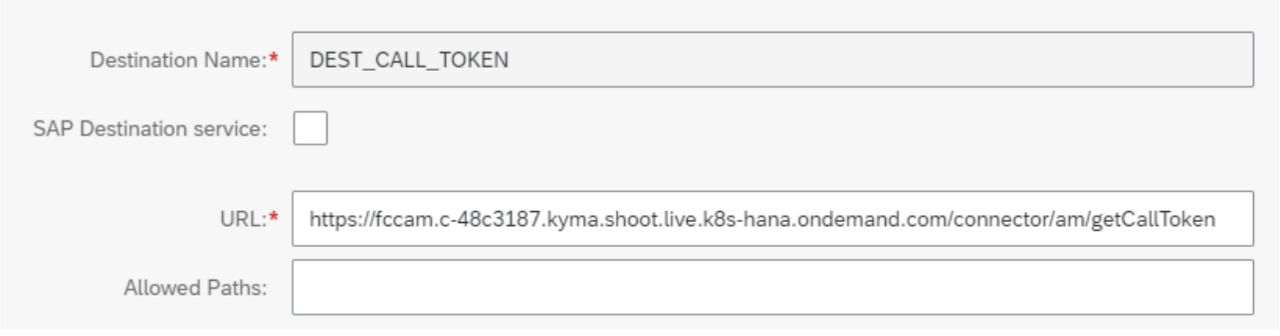
In the Custom Headers section, add the following header:
- Accept with value application/json;charset=utf8
and select Override Client.
This is needed to create a correct response from the backend.

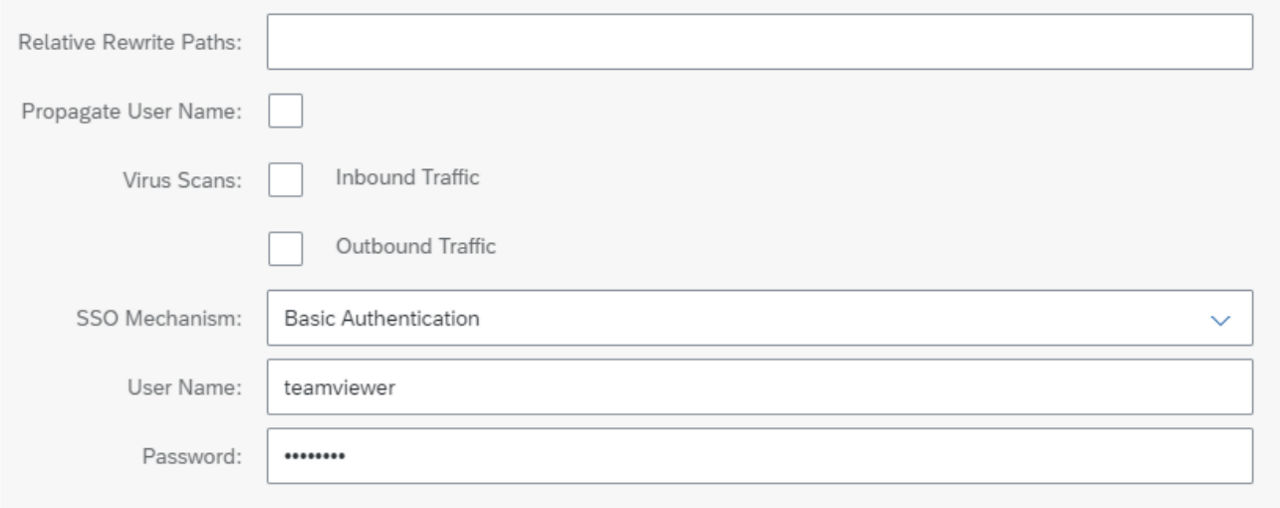
In the Destination Configuration section, select Basic Authentication as the SSO mechanism and provide your credentials supplied by TeamViewer.
Finish the creation of the endpoint by opening it in a browser:

You will at first get an error like this:
{"timestamp":"2022-07-14T15:48:20.255+00.00","status"400,error":"BadRequest","path":"/connector/am/getCallToken"}
You can add '&subject=tester' to the generated URL and load the page again, e.g.
https://<your-mobile-service-host>/DEST_CALL_TOKEN?auth=uaa&subject=tester
This will result in a JSON structure like this:
{"token":"eyJhbGciOiJIUZUxMiJ9.eyJpc3MiOiJGcm9udGxpbmUtQUOiLCJzdW liOiJOZXNoZXIiLCJpYXQiOjE2NTc4MTM3MzUslmV4cCI6MTY1NzgxNDYzNXO.a5ePJ_zHffOAj69h2Q8znYHgog_slzzQKrrJ96/CXCXGCK6RIKKZjJ8-HecFGIOW8IBmjWXNTLq_YhLv040KGw","issuedAt":1657813735623,"expiresAt":1657814635623}
Note: These tokens are only valid for a short amount of time and are requested by the extension when the call functionality is needed.
If you see this kind of a response, the destination has been set up correctly.
{"token":"eyJhbGciOiJIUZUxMiJ9.eyJpc3MiOiJGcm9udGxpbmUtQUOiLCJzdW liOiJOZXNoZXIiLCJpYXQiOjE2NTc4MTM3MzUslmV4cCI6MTY1NzgxNDYzNXO.a5ePJ_zHffOAj69h2Q8znYHgog_slzzQKrrJ96/CXCXGCK6RIKKZjJ8-HecFGIOW8IBmjWXNTLq_YhLv040KGw","issuedAt":1657813735623,"expiresAt":1657814635623}
Asset Manager Bundle Import
If you have been provided with a ready-made metadata bundle for the Asset Manager integration you can directly deploy it to your Mobile Services instance.
In your Mobile Services instance, open the Mobile App Update settings.

Select the Upload option.

Follow the instructions to upload your bundle file.
After the upload is complete, Deploy the new application version.

Your Asset Manager application will pick up the update automatically, and request the user to apply it.
Asset Manager Metadata Extension
If you are not using a provided metadata bundle, you can also modify your existing Asset Manager by using the Business Application Studio. The extension is provided as an MDK project that is integrated with Component Integration Metadata (CIM). A CIM file is provided for reference along with the project.
The extension resources are provided in the FrontlineExtension.zip archive.
Import Project
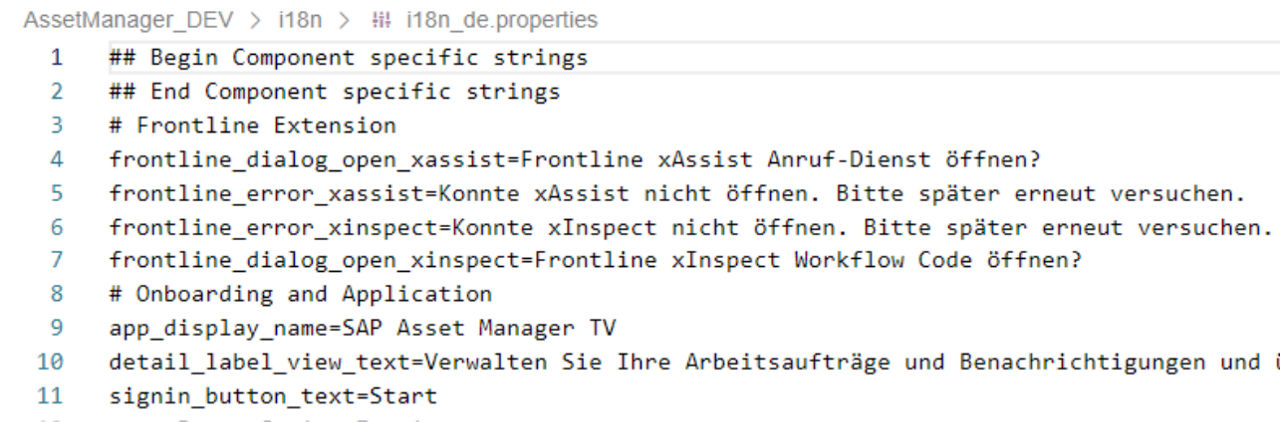
From the provided archive, import the FrontlineExtension project into your workspace. The files in the i18n folder contain translations for messages that are used by the extension.
Note: These files will overwrite the translation messages in the Asset Manager project. If you have made any modifications to translations, you will need to merge the translations manually.
Example of merged properties for de:
Setup CIM
Place the provided FrontlineExtension.cim file inside your Asset Manager project. this will set up the needed integration points for the customized client.
You should review the CIM setup to ensure that no other customizations are affected by the integration points.

Deployment
With these modifications in place, you can deploy the modified metadata to your Mobile Services instance.
Your Asset Manager application will pick up the update automatically and request the user to apply it.
DMS Access
DMS access allows the extension backend to upload PDF reports to customer storage. This is optional and can be set up after initial setup if required.
Follow the SAP guidelines on how to enable the DMS Integration Option API for your setup, e.g. refer to Connecting to Document Management Service, Repository Option Using API from the SAP help portal.
The Frontline backend will need to be able to request a JSON Web Token for accessing the DMS; you will find the required settings and credentials in the Service Key you have created:
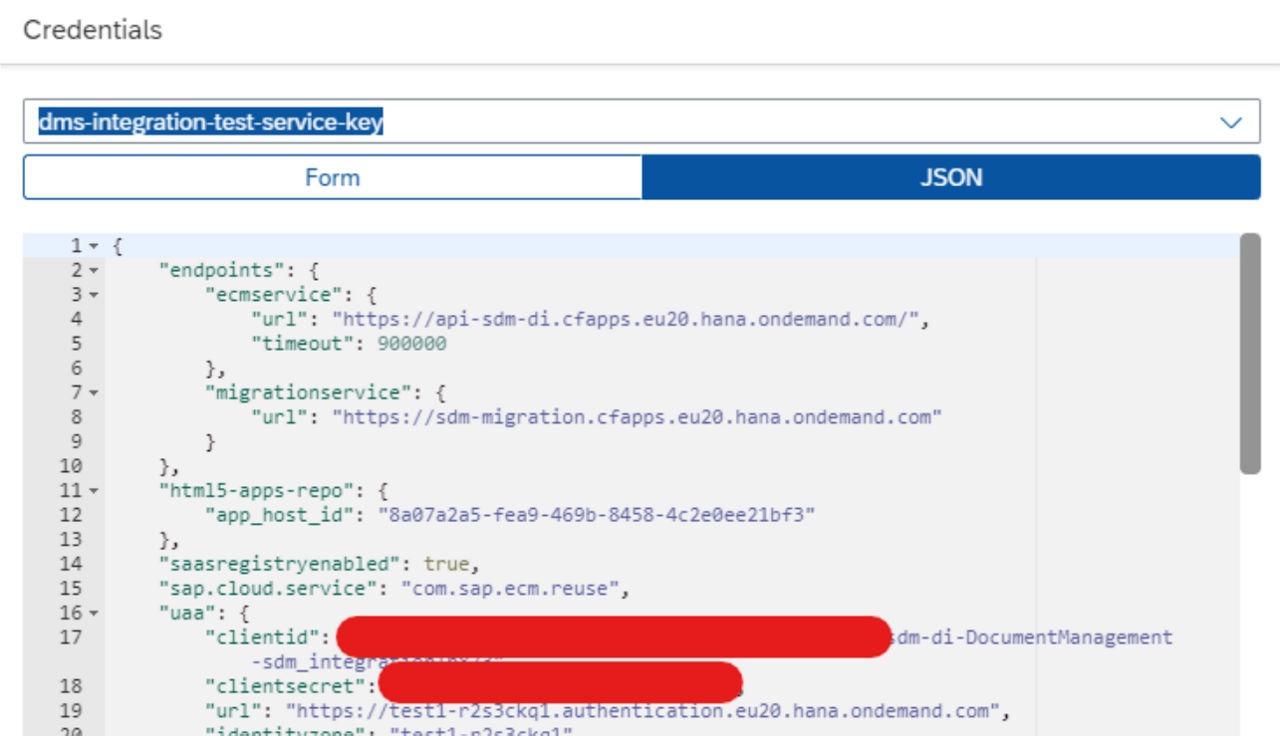
You will need to provide information on the endpoints and the authentication to your TeamViewer contact via a secure channel:
From the endpoints section the ecmservice / url value.
From the uaa section the clientid, clientsecret and url (authentication URL) values.
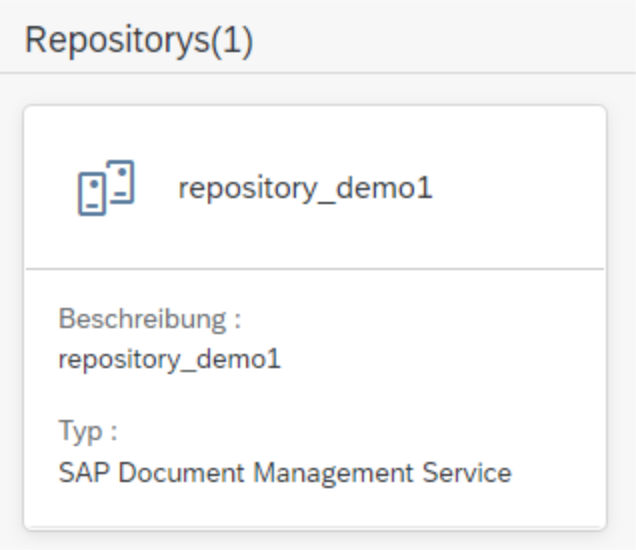
In addition to the access credentials, we also need to know which repository to use. If using the DMS Application Option, you can find the name in the repository overview, e.g.: