Multitenancy enables organizations to securely connect and manage multiple companies within a single structure. This setup is ideal for organizations with subsidiaries or partners that require shared access while maintaining separate data and permissions. With multitenancy, a parent company can invite child companies, assign tenant managers, and manage access across organizations.
This article applies to TeamViewer Tensor, TeamViewer ONE Advanced, and TeamViewer ONE Standard license holders. Multitenancy is not available for the Tensor Access license yet.
Note: Multitenancy is available only in the TeamViewer web client. It is not available in the TeamViewer client.
The multitenancy setup is not shared between Management Console (Tensor Classic) and TeamViewer Tensor. To use multitenancy across both products simultaneously, you must configure it separately in each instance.
Requirements
- Parent company must have:
- Active Tensor or TeamViewer ONE license.
- Manage permission for Multitenancy.
- Child company must have:
- Any TeamViewer license that allows company creation. Currently, Business licenses can't be added yet.
- Manage permission for Multitenancy.
The Multitenancy section is always visible in Admin settings for company administrators across all TeamViewer licenses.
How to set up company-based multitenancy
Create an invitation (parent company)
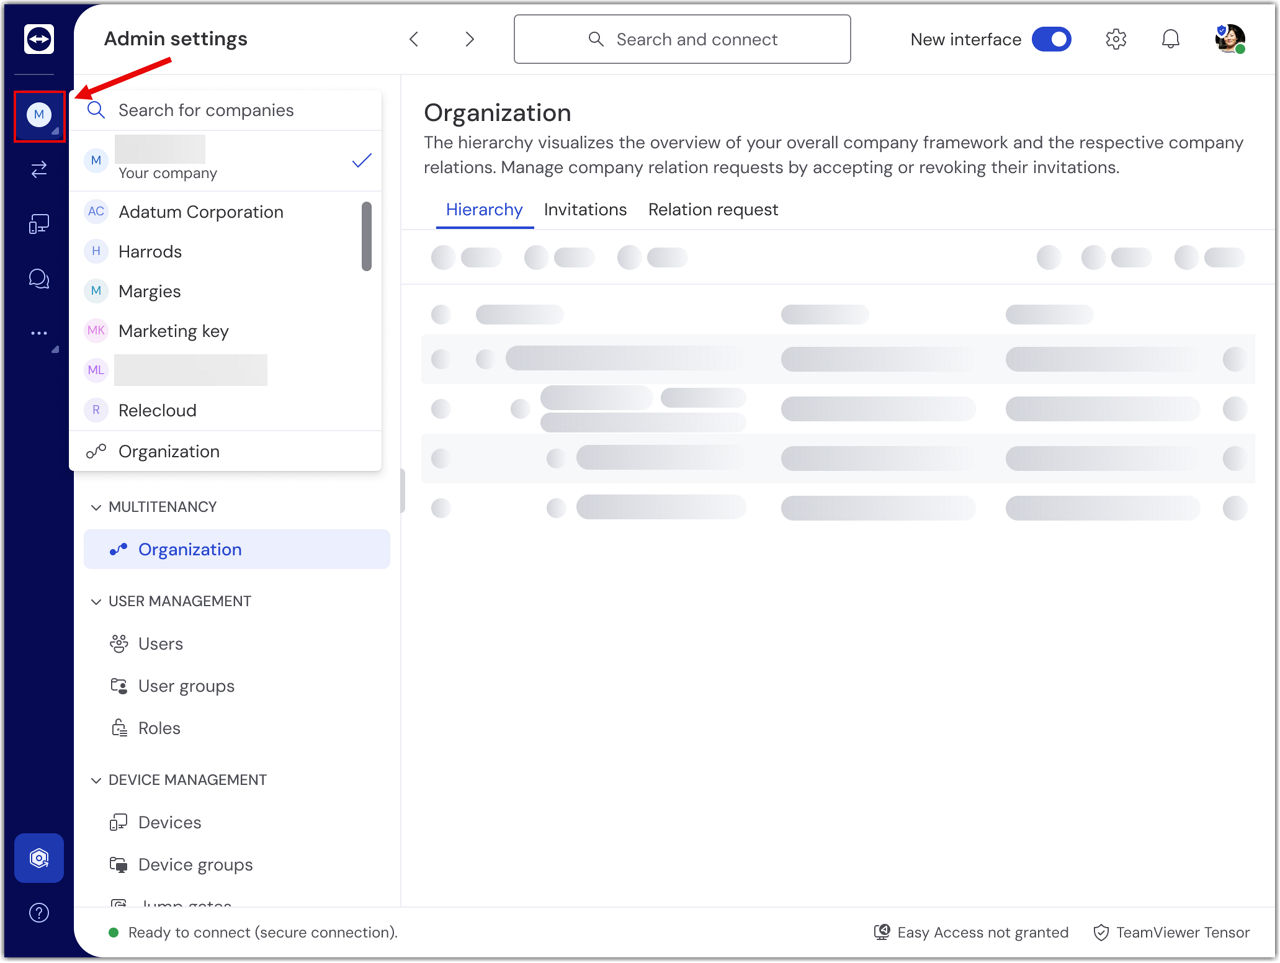
1. Go to the Multitenancy section and click Organization.
2. In the Invitations tab, click Create invitation.
3. Add a description.
4. Choose between One-time use or Reusable and the desired expiration time.
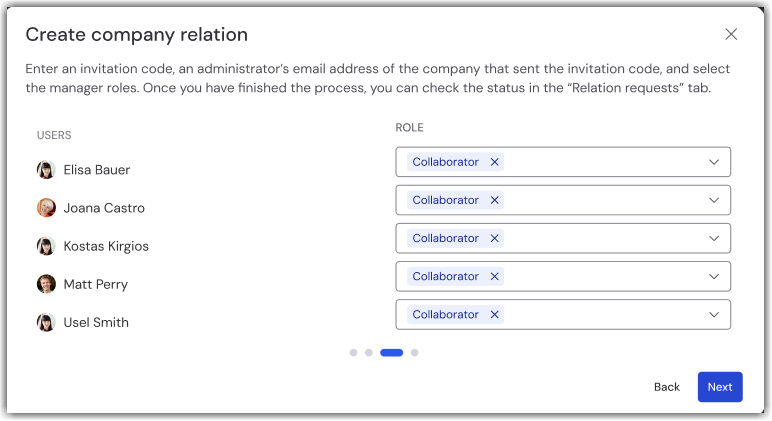
5. (Optional) Select up to 10 users to assign as tenant managers.
6. Share the invitation code and a parent company administrator email with a child company administrator.

Join the organization (child company)
1. Go to the Relation requests tab.
2. Click Join.
3. Enter the invitation code and parent company admin email.
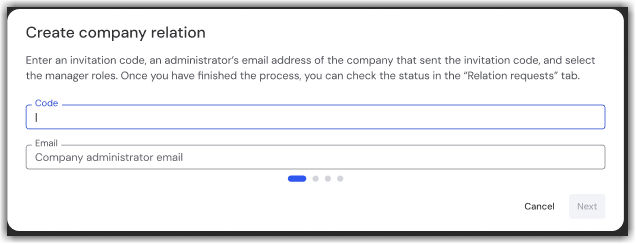
4. Check the acknowledgment box.

5. (If tenant managers were assigned) Set their roles.
Review and approve the request (parent company)
- Go to the Invitations tab.
- Select the request and click Review request.
- Review assigned permissions.
- Click Approve or Reject.

How to manage your multitenancy organization
Revoke a pending invitation (parent)
This is only possible if the invitation code is still active. Once revoked, the invitation code becomes invalid and cannot be used again.
Revoke a pending relation request (child)
If the child company decides not to proceed, it can revoke the request. A pending request can be revoked, canceling the request to join the parent organization. Once the relationship is established, the company can terminate it in the Hierarchy tab.
Terminate a relation (parent or child)
Either the parent or child company can terminate an existing multitenancy relation at any time. Once the relation is terminated, the companies are no longer connected, and all tenant manager access granted through the relation is removed from the child company. If the companies want to reconnect in the future, they must create a new invitation and complete the multitenancy setup process again.
To terminate a multitenancy relation, follow these steps:
- Go to the Hierarchy tab.
- Select the company.
- Click Terminate relation.
- Confirm by clicking Terminate.

Note: To re-establish a terminated relation, repeat the full setup process.
Request to add tenant managers (parent)
- Go to the Hierarchy tab.
- Select the child company.
- Click Add tenant managers.
- Choose users (only those not already added or pending) and click Add tenant manager.
- The child company will review the request in Pending requests.

Approve or decline tenant manager requests (child)
- Go to Pending requests under User management.
- Click Accept or Decline for each request.
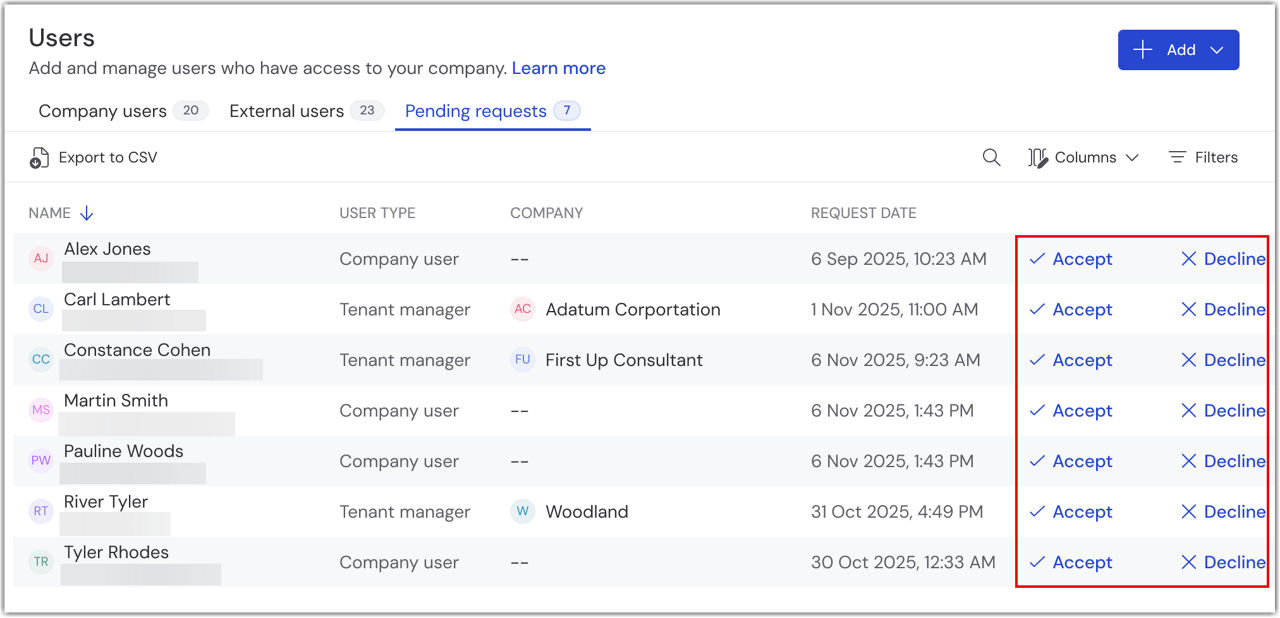
Notes:
- If the user joining has multiple licenses assigned, you must select one license to assign to the user.
- Bulk actions are not supported.
Remove tenant manager access
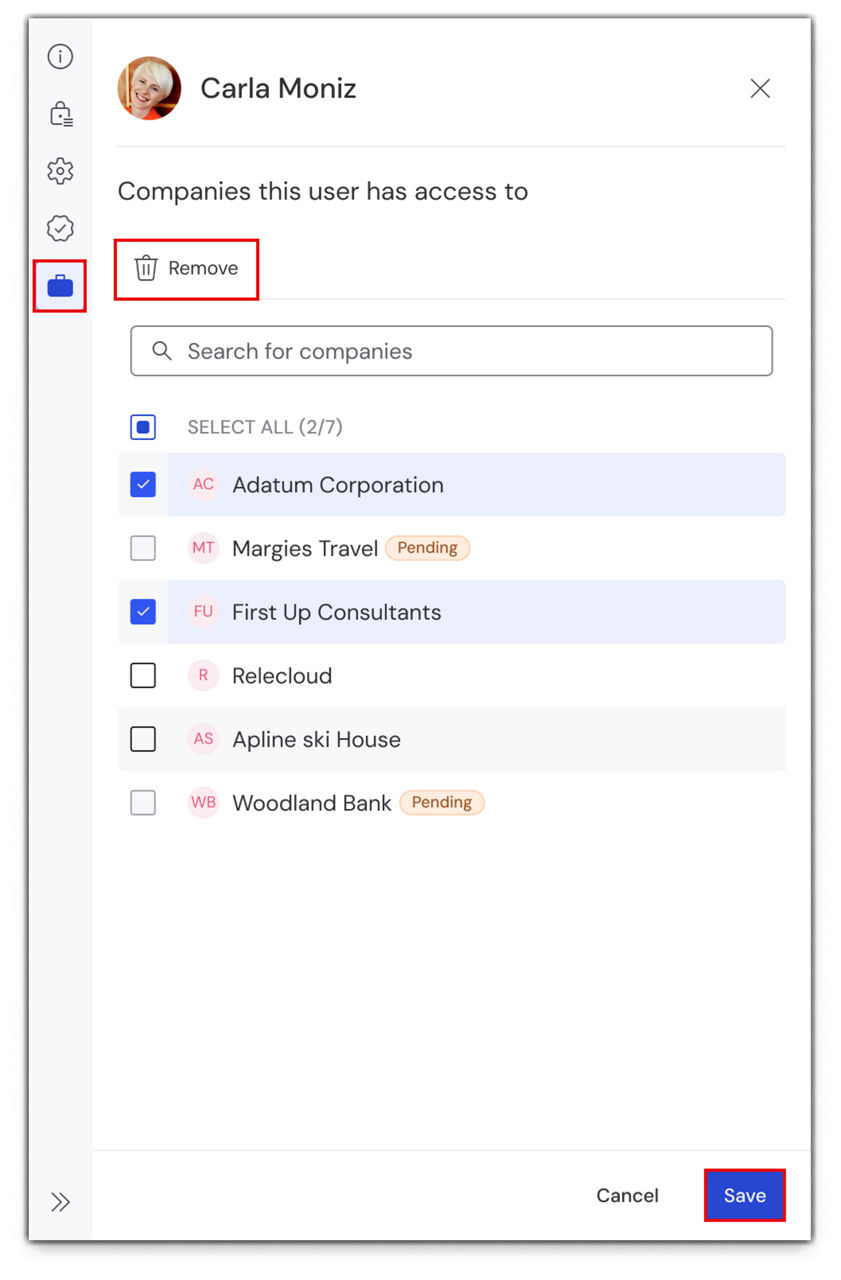
- Parent company: go to Company users, open user details, and remove access under Multitenancy.
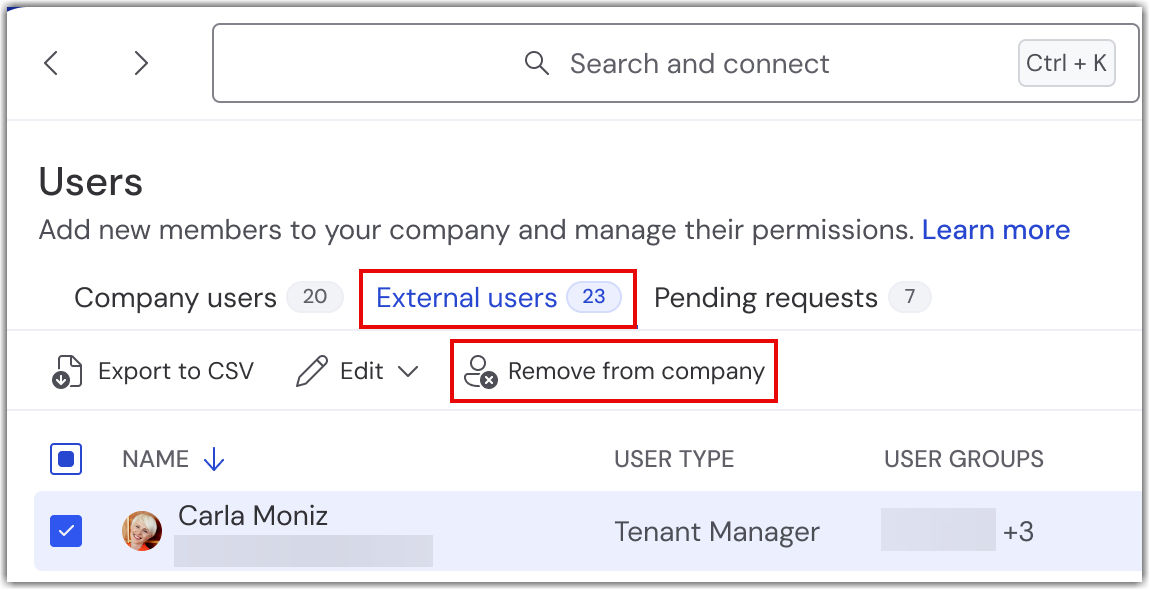
- Child company: go to External users, select the user, and click Remove from company.
Use the tenant switcher
Tenant managers can switch between companies they have access to using the Tenant switcher. This includes their own company and any connected ones.
Auditability and event logs for multitenancy
Multitenancy management actions are logged for audit and compliance purposes.
Event logs are available for both parent and child tenants and help administrators track configuration and management changes.
- All multitenancy-related actions are recorded in the Event Log
- Multitenancy events use Event type = Multitenancy
To review these events, open the Event Log and apply the appropriate filters.
Multitenancy interactive demo
Explore multitenancy in action with an interactive, step‑by‑step demo.
The Multitenancy Demo shows how multitenancy is structured and managed, helping you understand the relations between parent and child tenants.